Achieve a luxurious aesthetic without breaking the bank with these 13 creative and affordable DIY wall art projects.
You don’t need to spend a fortune on custom artwork. By using simple crafting materials and tapping into your creativity, you can create stunning DIY wall art that looks expensive. What’s even better is that these art ideas won’t break the bank, making them a budget-friendly option for decorating your space.
With custom, DIY wall art, the possibilities are endless. You have the freedom to create unique pieces that perfectly fit your style and fill any empty spaces in your home. Take a look at our ideas for inspiration and let your imagination run wild as you showcase your artistic talents.
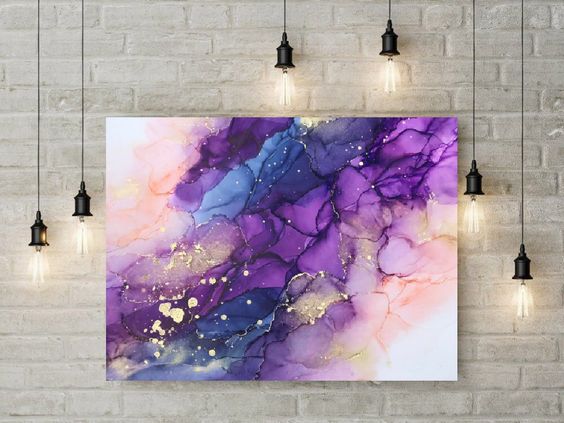
1. DIY Abstract Art
Creating your own abstract art doesn’t have to break the bank. Instead of shelling out big bucks for large-scale pieces, try your hand at making your own free-form masterpiece with just a few simple supplies. Even if you’re not an artist or a professional painter, our easy technique for DIY canvas art with watercolors will help you create a stunning work of art that’s uniquely yours. Plus, you’ll save money in the process!
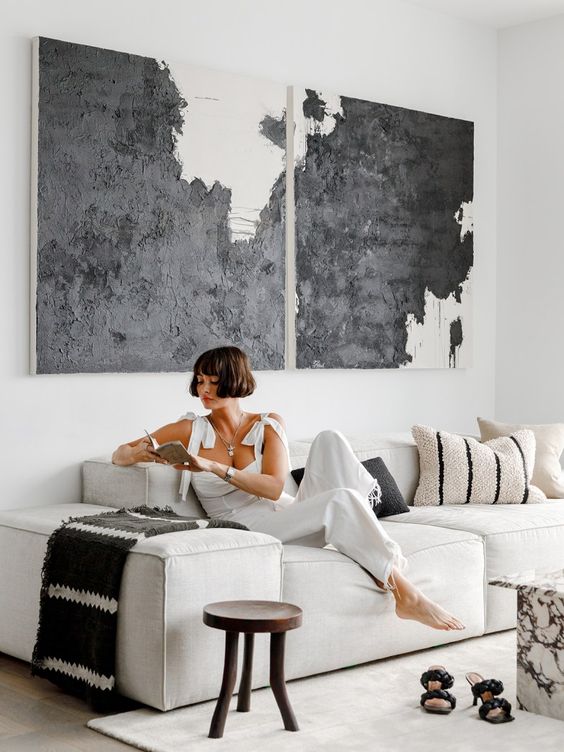
2. Minimalist Masterpiece
Looking for a creative way to repurpose your old closet panels or interior doors? Why not transform them into stunning pieces of art? This unique DIY project takes unconventional materials, such as doors as oversized canvas panels and a mop as a paintbrush, to create modern and monochromatic artwork that is sure to ignite conversations. Give your old doors a new lease on life and let your creativity shine with this innovative wall art idea.
3. Splash of Neon
Transform your walls with this simple and creative DIY project using dry-erase boards as your artistic canvas. Get ready to make a splash by combining water and vibrant spray paint. As you alternate between spraying the boards with water and paint, don’t forget to blot away any excess water with paper towels. The process is straightforward, yet the end results are truly breathtaking.
4. Chevron Wood Shims
By arranging vibrant colored wood shims in a captivating chevron design. Begin this creative endeavor by visiting your nearby hardware store, where you can acquire wood shims and cans of spray paint in an array of delightful shades. To enhance the visual appeal, we suggest alternating the hues in a spontaneous pattern, adding an extra touch of intrigue to your creation.
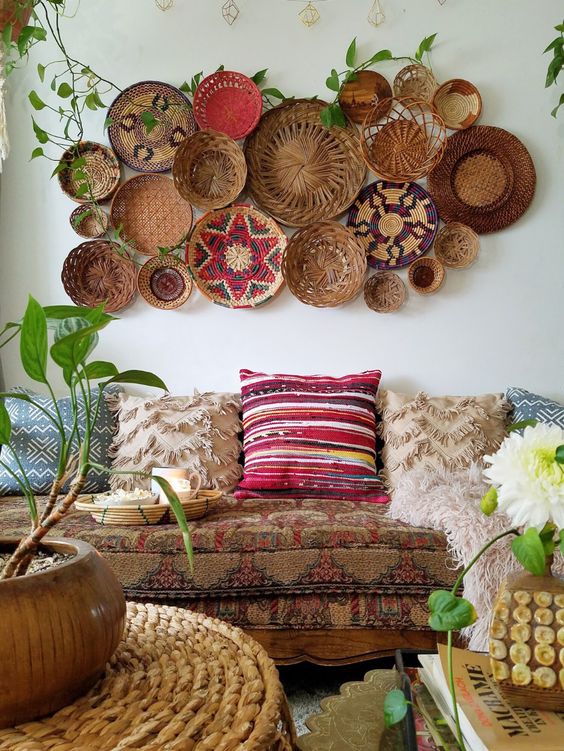
5. Easy Gallery Wall
Transform your space with a stunning gallery wall that can be effortlessly created using decorative objects. The secret lies in selecting items that have a common element, such as the circular shapes showcased here. Enhance the intricate details of a cast-iron register grate by applying white paint, while a gilded-metal picture frame is adorned with pink string woven like a delicate spiderweb to display decorative cards. Give new life to a faded painting discovered at a flea market for just $4 by transforming it into a captivating DIY wall art piece, embellished with forest features using paint pens.
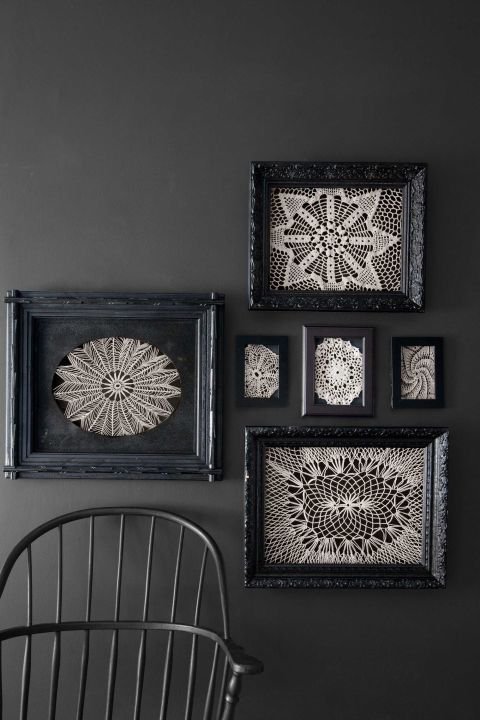
6. Simple Lace Art
DIY wall art using lace and embroidery hoops. By combining lace pieces with floral fabrics and securing them within wooden hoops, you can craft a captivating display. Experiment with different lace designs and layer them to achieve one-of-a-kind textures. After achieving the desired aesthetic, neatly trim any surplus fabric and secure the edges to the backs of the hoops using glue.
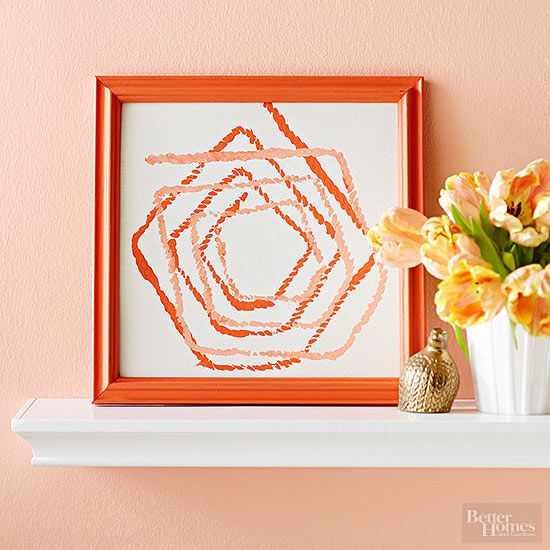
7. Two-Tone Stamp Art
Transform a plain cardstock into a unique masterpiece with homemade materials using these simple steps:
- Create your desired pattern by hot-gluing 3 feet of 1/2-inch-wide cotton rope onto a piece of scrap wood or cardboard.
- Lightly paint the rope with acrylic crafts paint and press it onto the cardstock.
- For a two-tone effect, repeat the process with a second color and twist the block a quarter-turn.
- Let it dry and frame your custom artwork.
8. Pixelized Accent Wall
Get creative and make your own affordable pixel-inspired artwork by using a basic plywood or MDF panel along with some crafts paint. Let your imagination run wild and create large, custom pieces that will surely impress.
- Begin by sanding and cleaning the wooden panel, then mark a grid of squares using a pencil.
- Organize the crafts paint in a color palette, starting from light to dark shades.
- Assign a specific color to each square, with lighter shades at the bottom and darker shades at the top.
- Tape off the squares and paint them, ensuring each square dries before moving on to the next.
- For a watercolor effect, add water to the paint to create transparency in certain squares.
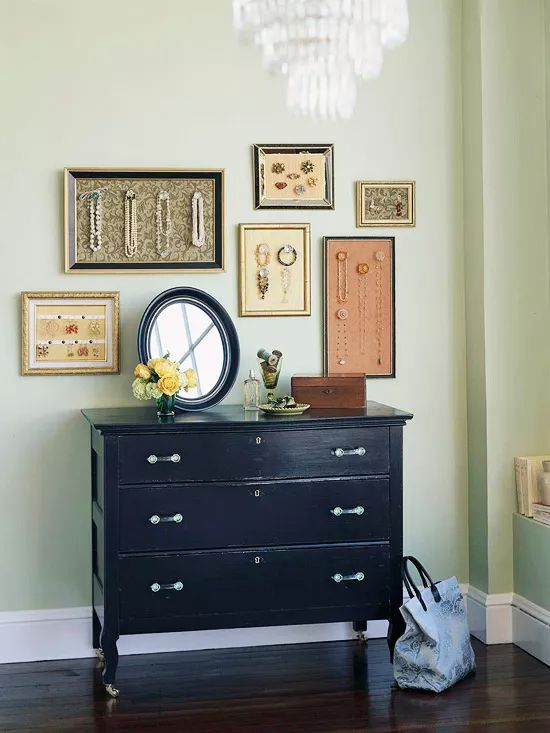
9. Jewelry Art
Transform your favorite trinkets into stunning framed artwork using this easy method. Utilize affordable frames from flea markets to exhibit vintage jewelry or sentimental heirlooms. Enhance the frames with fabric or paper, ribbon, and glass knobs to craft a beautiful arrangement that also serves as a practical jewelry storage solution.
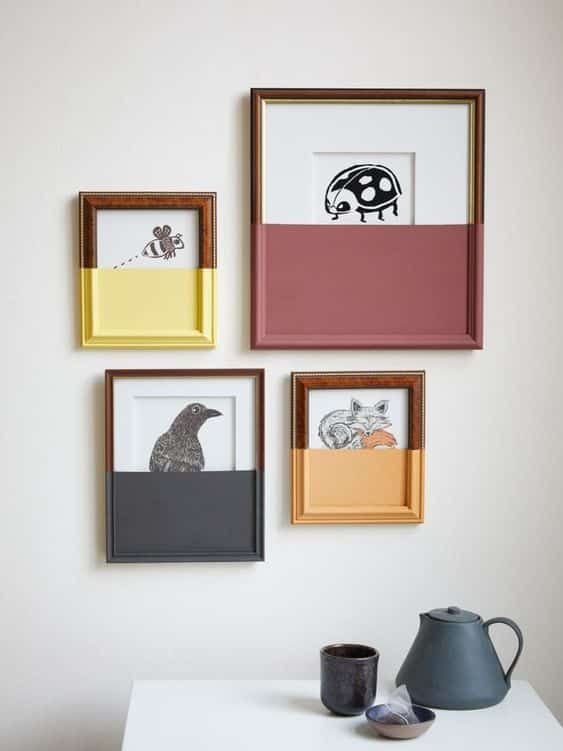
10. Color Block Frames
With the help of acrylic paint and a touch of creativity, framed prints can be effortlessly transformed with vibrant colors. Begin by deciding which sections of the framed print you wish to enhance.
- Take the print out of the frame.
- Measure and cut poster board to fit the print’s height and desired width.
- Paint the poster board and wait for it to dry.
- Attach the painted poster board to the print using double-sided tape, then put the artwork back in the frame.
- Paint the corresponding areas of the frame to match the color block, let it dry, and then hang it up.
11. Painted Embroidery Wall Art
Transform your accent wall into a stunning embroidery-inspired masterpiece with our simple and enjoyable DIY design.
- Create a grid of 1×1-inch squares on two 2×4-foot plywood sheets using a straight edge.
- Paint Xs in the corresponding squares using acrylic crafts paint, following our free pattern.
- Apply water-based polyurethane to the panels and allow them to dry.
- Attach two 1x2x42-inch furring strips vertically, 1 inch from the left and right edges, using wood glue to fasten the plywood panels together.
- Place two more strips between the first two and another two strips between them, then clamp all the support strips and let them dry. Finally, hang the panels using French cleats.

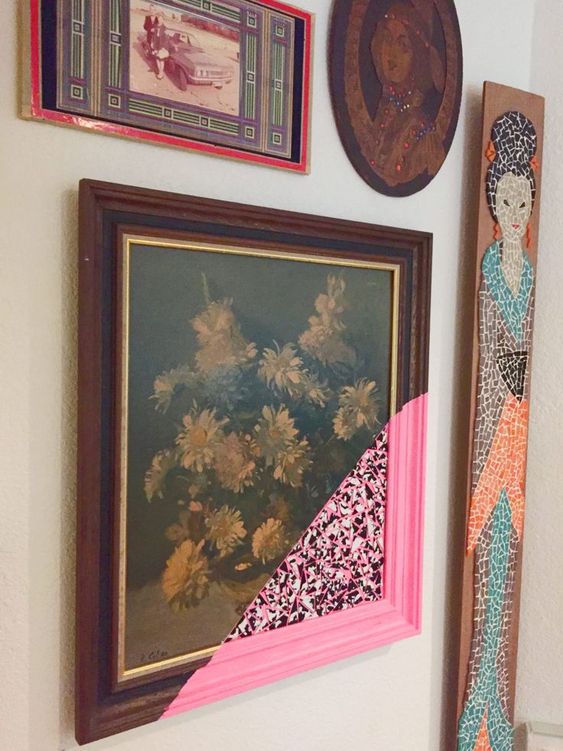
12. Thrift Store Reinvention
Revamp a secondhand wall art into a distinctive decor item for your abode by incorporating geometric stitching. Remove the frame and utilize embroidery thread to stitch your preferred pattern onto the picture. Apply paint to the frame, allow it to dry, and reassemble it. Showcase your revamped artwork on the wall, dresser, or mantelpiece.
13. Botanical Book Art
Transform your walls into a stunning display of homemade art by incorporating botanical images. Discover free images online and print them onto old book pages. To add texture, cut a piece of linen slightly larger than the page and machine stitch 1/4 inch from all edges. Create a frayed edge by pulling out threads down to the stitched line. Attach the page to the linen mat with a sewing machine, then hang using bulldog clips.
